Navigate to Company Account>Scheduling
...
| Table of Contents | ||||||||||||||||||
|---|---|---|---|---|---|---|---|---|---|---|---|---|---|---|---|---|---|---|
|
...
TIP: Do not differentiate Cancellation Types between “Client” vs “Staff” as you will first select who cancelled the appointment in Rethink and then select the Cancellation Type. Cancellation Types are not WHO cancelled but WHY an appointment was cancelled
Adding, Editing, and Deleting Cancellation Types
Step | Description | Helpful Knowledge |
|---|---|---|
Click Add New Type, Edit, or Remove to customize your type of Scheduling Cancellation |  |
|
Your Cancellation Type will be Active by default. Click Save | 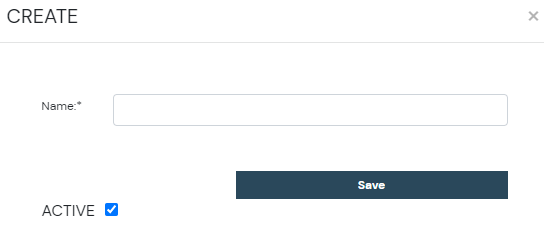 |
|
...
For more detailed instructions on this feature, please refer to the following guide: Uncancel Appointments (Website-Desktop Only) Tutorial
Uncancel Reasons
To list specific uncancel reasons for your organization, utilize the Add New Reason button in the table to add additional reasons or the Edit and Remove buttons to modify the account defaults.
...
Note: At least one uncancel reason must be present in your account.
...
For more detailed instructions on this feature, please refer to the following guide: Unarchive Appointments (Website-Desktop Only) Tutorial
Unarchive Reasons
To list specific unarchive reasons for your organization, utilize the Add New Reason button in the table to add additional reasons or the Edit and Remove buttons to modify the account defaults.
...
Note: At least one unarchive reason must be present in your account.
...
Nonbillable Tags are required as they take the place of a service name/billing code. Nonbillable tags describe what is going on during that non-billable type appointment. Common examples are Meetings, Trainings, Material Making, PTO, and Admin/Office Time.
Adding, Editing, and Deleting Tags
Step | Description | Helpful Knowledge |
|---|---|---|
Click Add Tag, Edit , or Remove to enter, edit or delete your custom Billable or Non-Billable Tags | 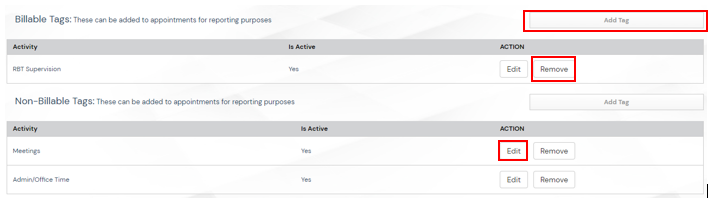 |
|
Your Billable or Non-Billable Tag will be Active by default. Click Save |  |
...
Only billable appointments meeting certain criteria will be seen as billable or payable. Customization of these “completed” appointments can be done at the practice level, with the exception of staff verification - all appointments need a staff member to verify that it occurred.
Defining “Completed” Billable Requirements
Step | Description | Helpful Knowledge |
|---|---|---|
Scroll to the bottom to select which completed billable requirements are needed. | 
| These requirements determine what your practice requires for billable appointments to be seen as “completed' and therefore ready for billing. |
If you want staff to take action on appointments that are tagged as “No Authorization”, turn this feature on. | 
|  Appointments will be tagged with “NO” Authorization when:
|
...
The hours shown on calendar display the time frame for the practice’s scheduling calendars. The default calendar view on the scheduler will show a 24 hour time frame.
Adjusting Hours Shown on Calendar
Step | Description | Helpful Knowledge |
|---|---|---|
Scroll to the bottom to adjust the hours shown on calendar. | 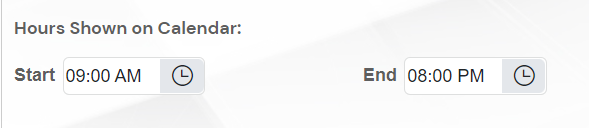
|
|
...
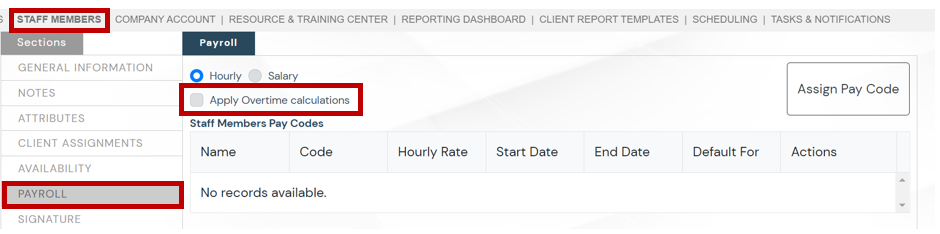
Overtime Rules
This is an optional feature to turn on. We cannot prevent anyone from going into overtime but can track it on your Payroll Export.
Turning on overtime rules allows the system to list accurate overtime calculations on the payroll export report. Overtime rules will be dependent on your state and is the responsibility of the practice to know your applicable work laws.
Turning On Overtime Settings
Step | Description | Helpful Knowledge |
|---|---|---|
Scroll to the bottom to adjust the overtime settings. Select your standard workweek used for overtime calculations, the overtime multiplier, the rate the multiplier will be calculated from, and any applicable hour thresholds. | 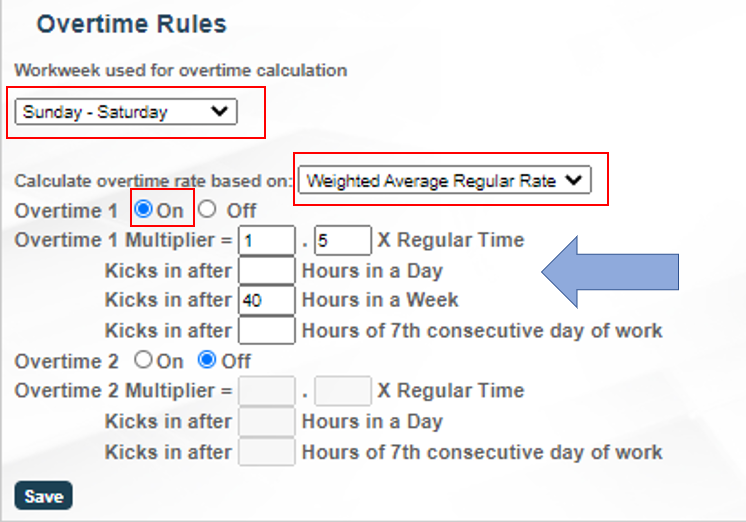
|
|