In this guide, users will learn the details behind adding, editing, and cancelling appointments in the Rethink Scheduler.
| Table of Contents |
|---|
Adding Appointments
Steps | Description | Helpful Information |
|---|---|---|
Creating an Appointment | Navigate to Scheduling 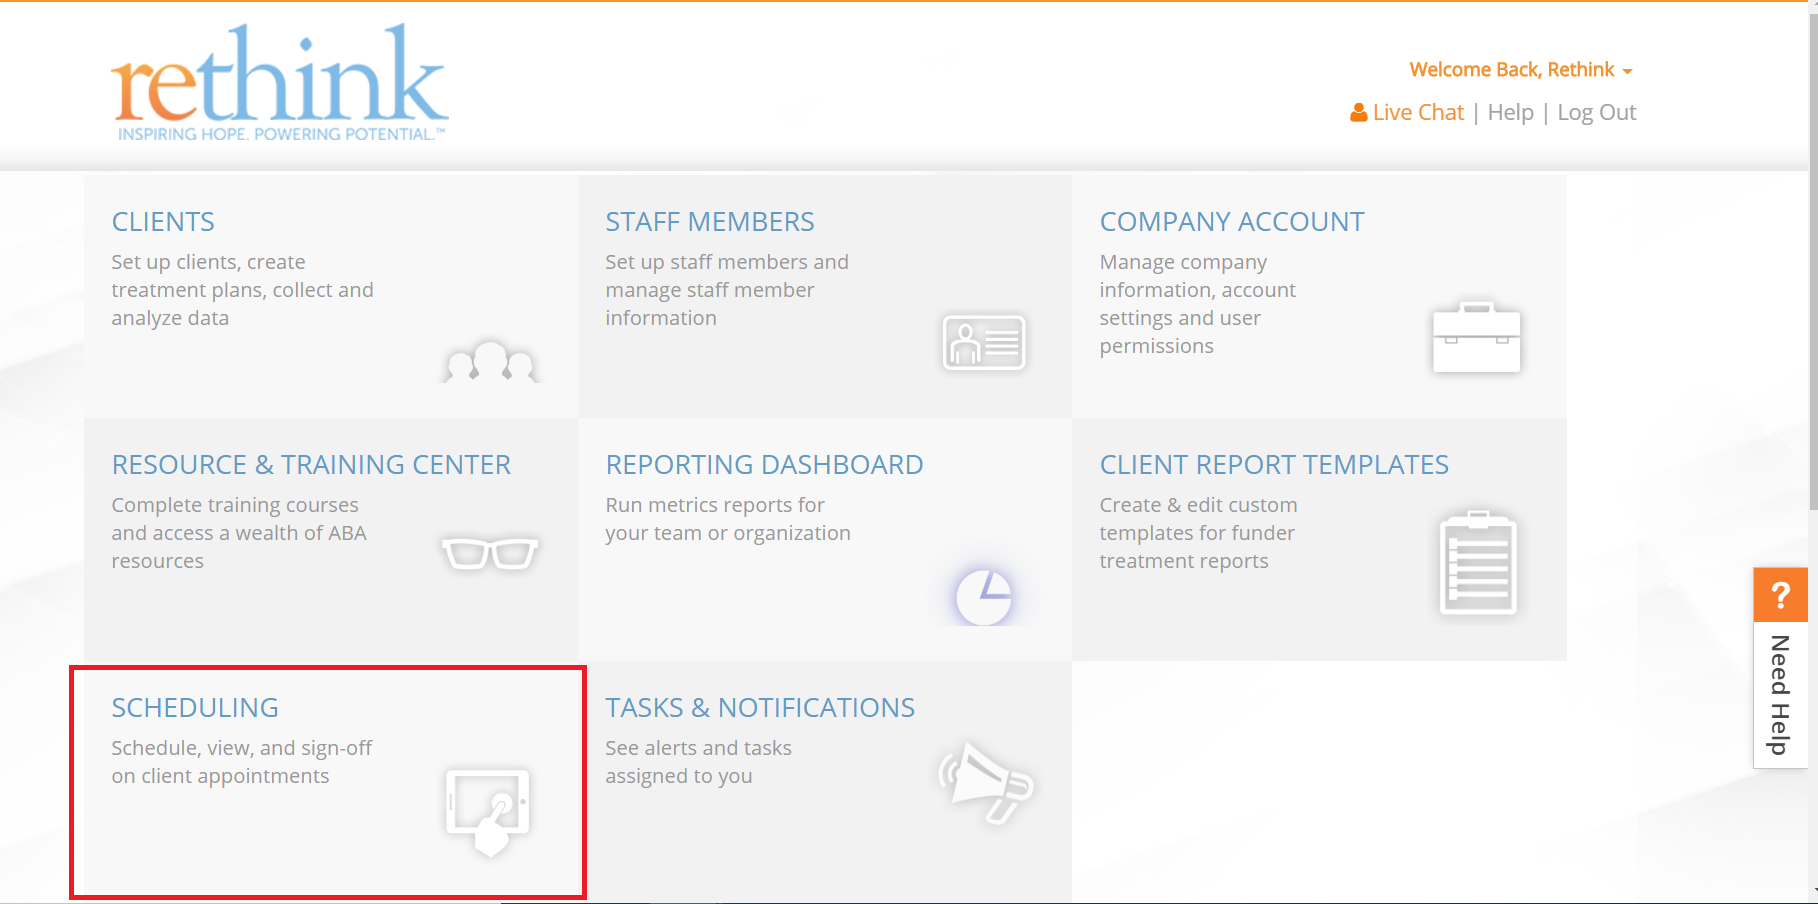 There are 2 options to create an appointment in Rethink: Option 1: Dragover your desired appointment date & time 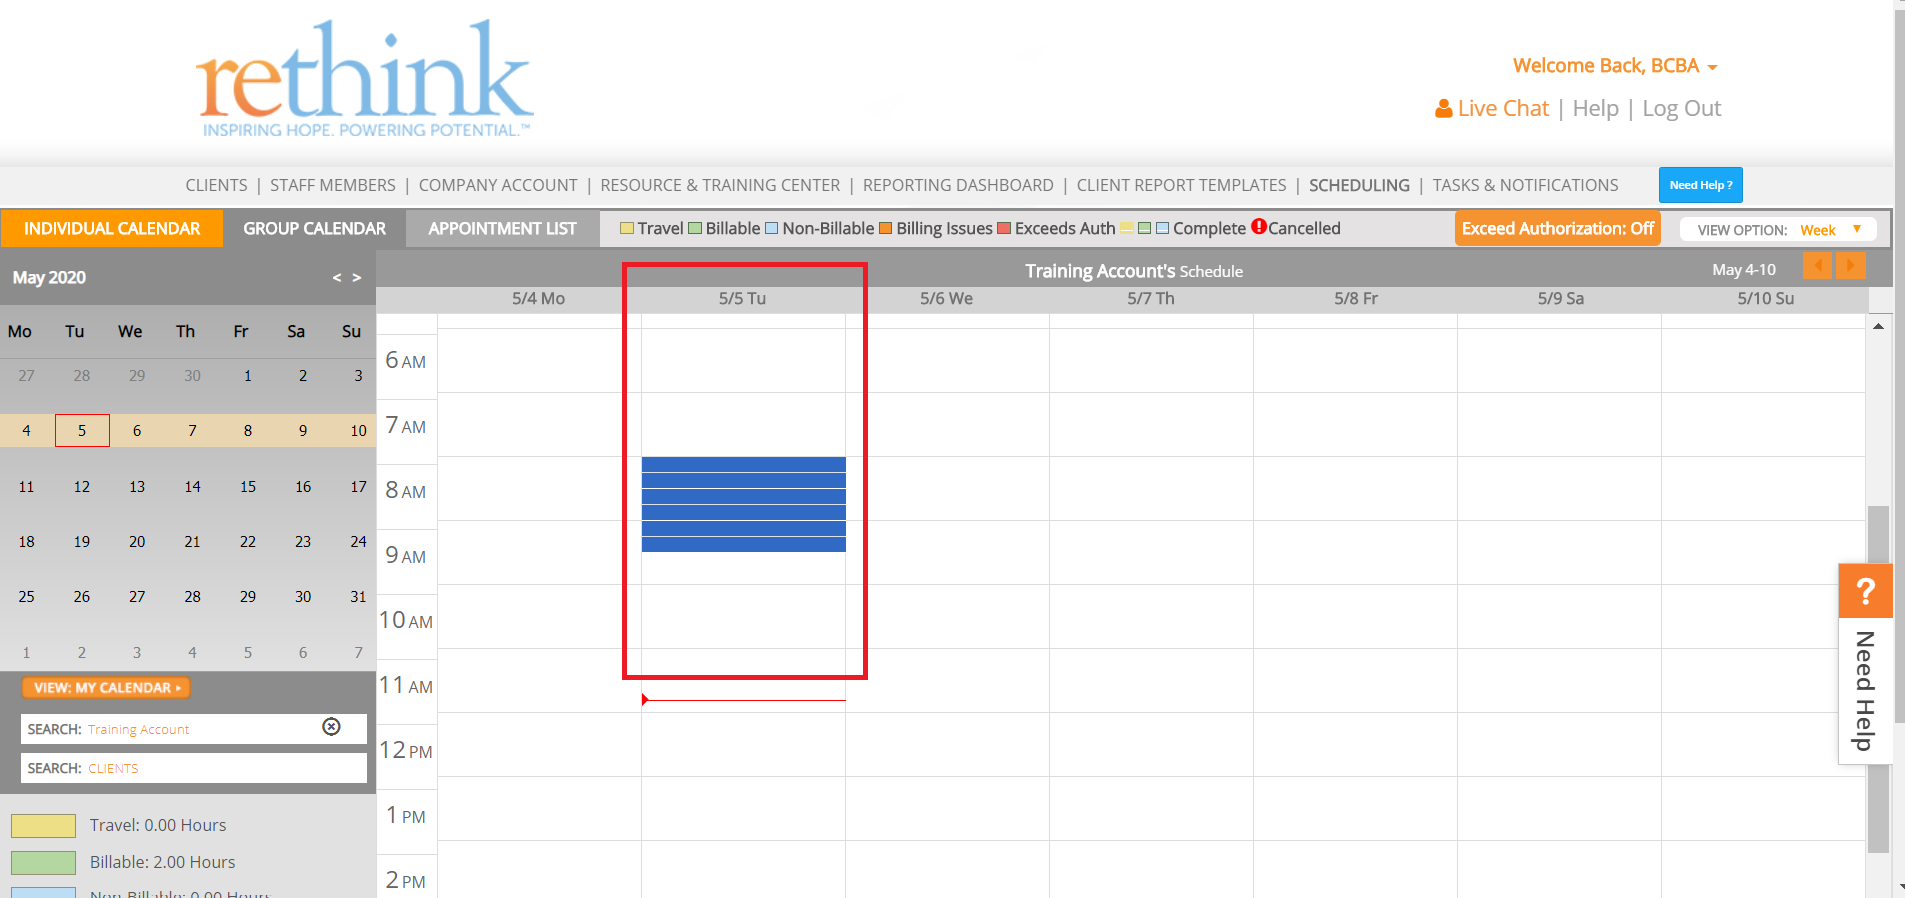 Option 2: Right clickon your desired appointment date & start time 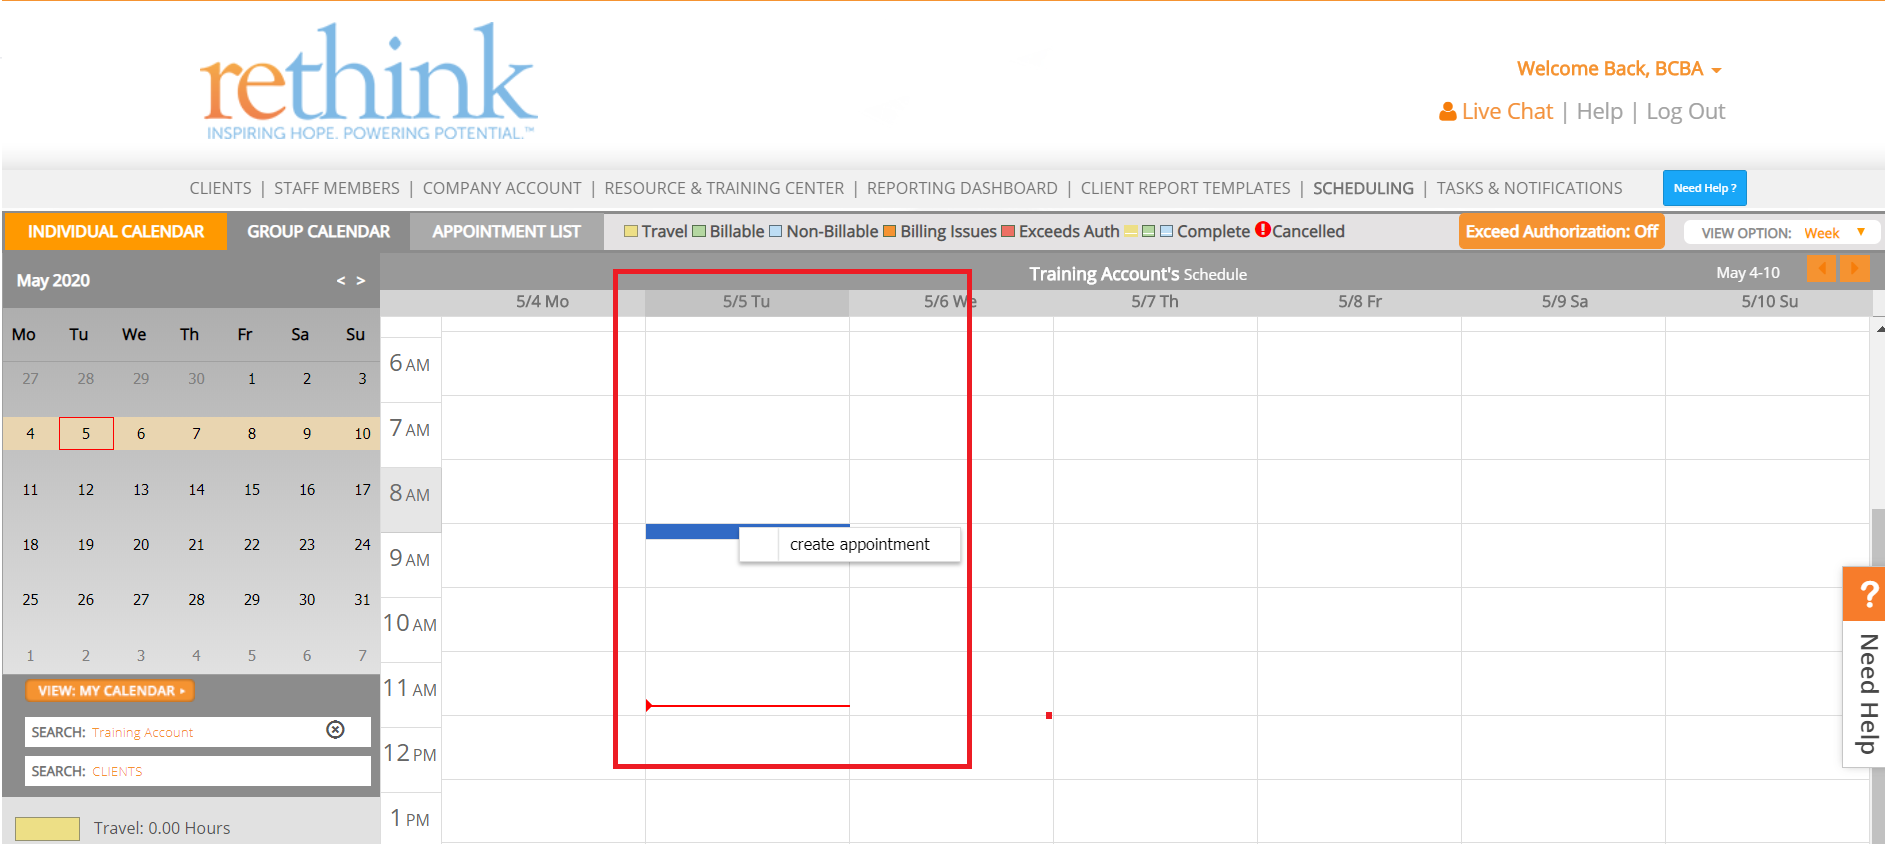 |
|
Choosing the Appointment Type | There are 3 appointment types when scheduling an appointment: Billable, Nonbillable, and Travel. Scheduling a Billable Appointment: Complete all required fields marked with an “*”: Outlined below are the required fields for a BILLABLE appointment: 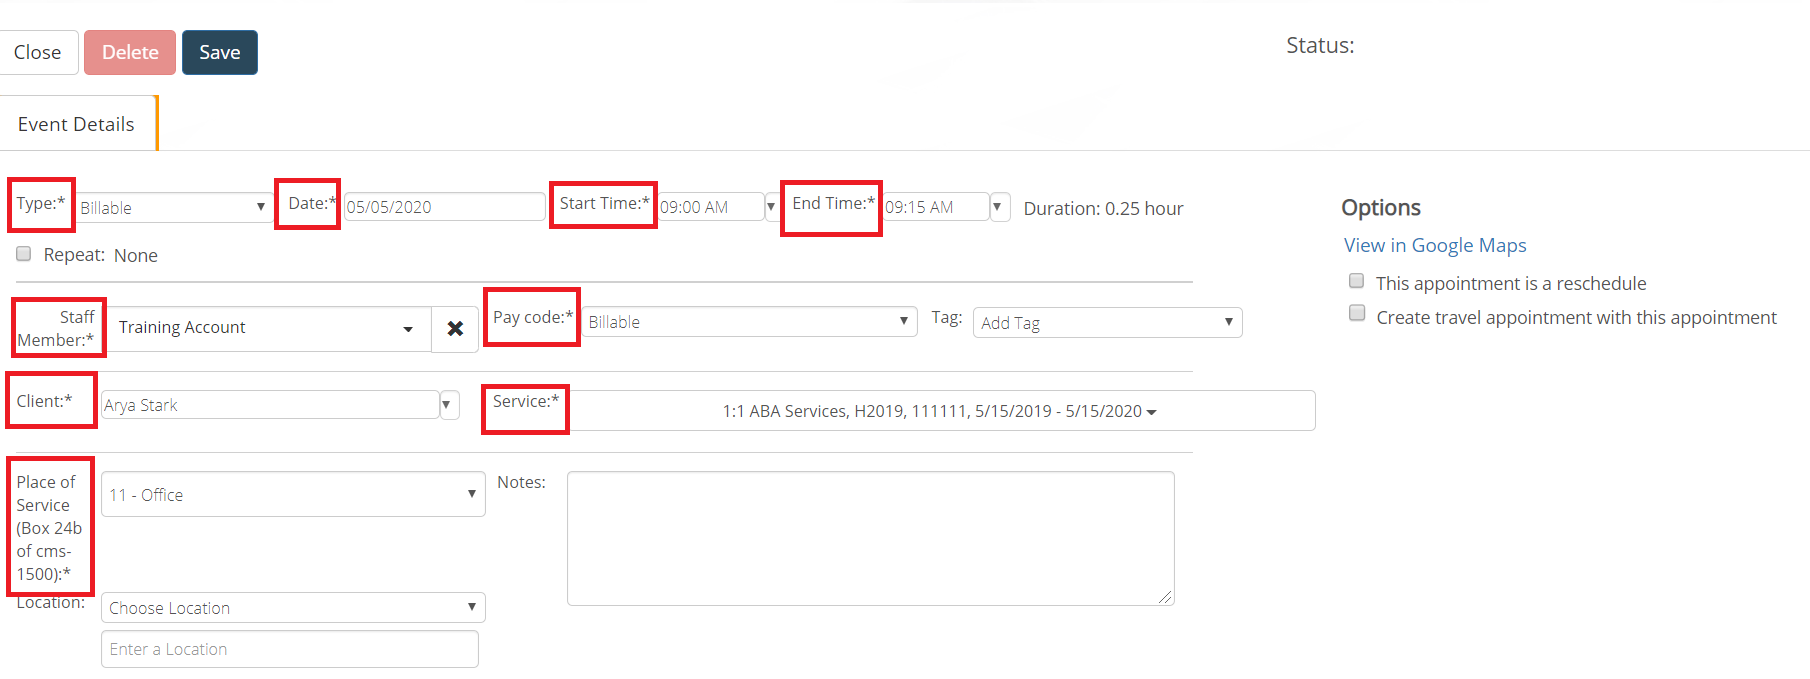 Once all required fields are entered Click SAVE Scheduling a Nonbillable Appointment: Below are the required fields of a NON-BILLABLE Appointment 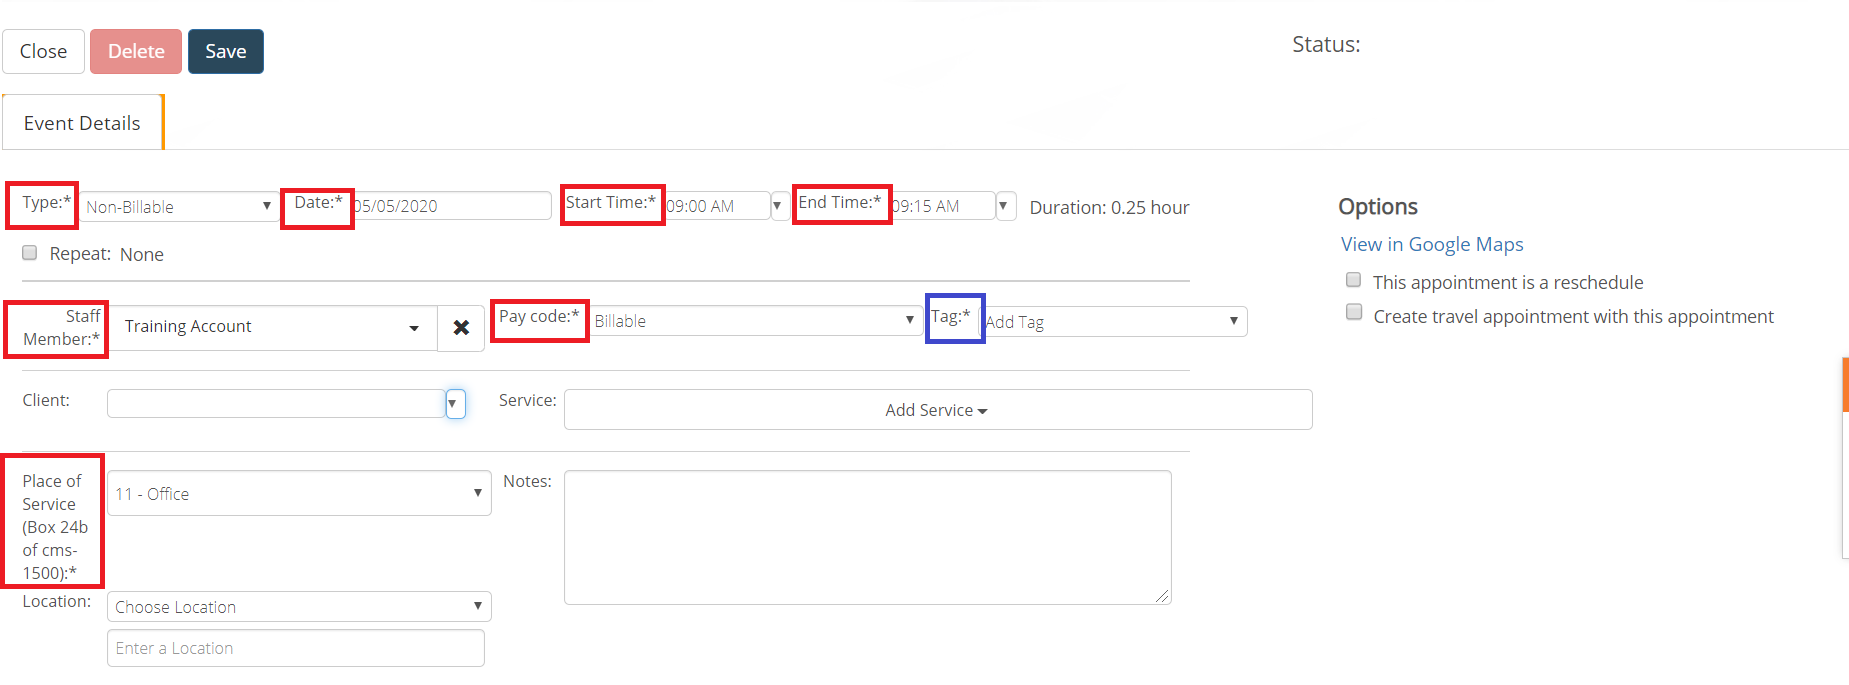 Once all required fields are entered Click SAVE Scheduling a Travel Appointment: Here are the required fields of a Travel Appointment 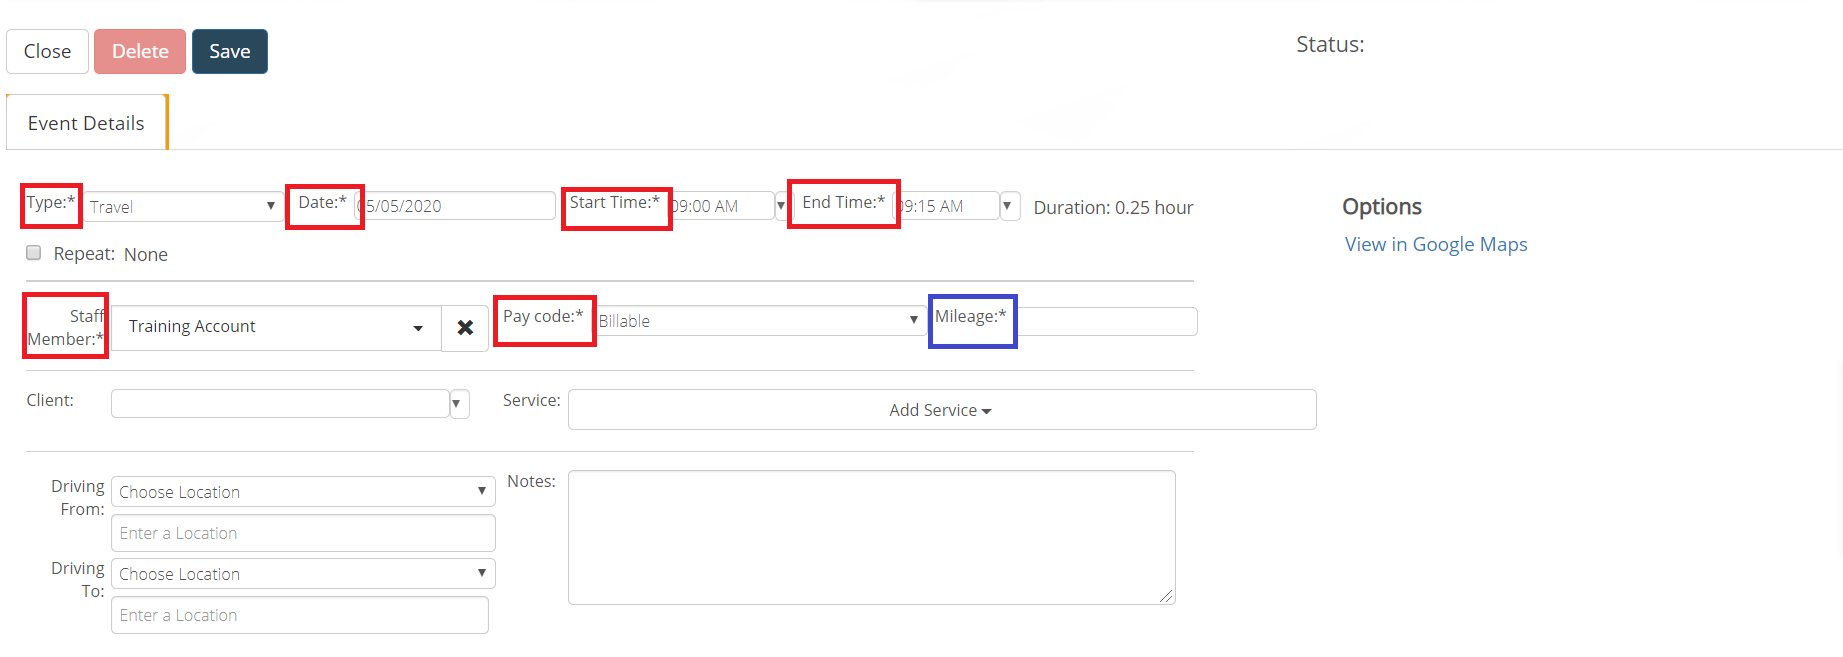 Once all required fields are entered Select SAVE | Required Field Details for ALL Appointment Types:
Additional Requirements for BILLABLE Appointments:
Additional Requirements for NONBILLABLE Appointments:
Additional Requirements for TRAVEL Appointments:
|
Scheduling a Series Appointment | If an appointment recurs in a weekly or monthly pattern, you can set up a recurring or “Series” appointment. When creating the appointment, click REPEAT 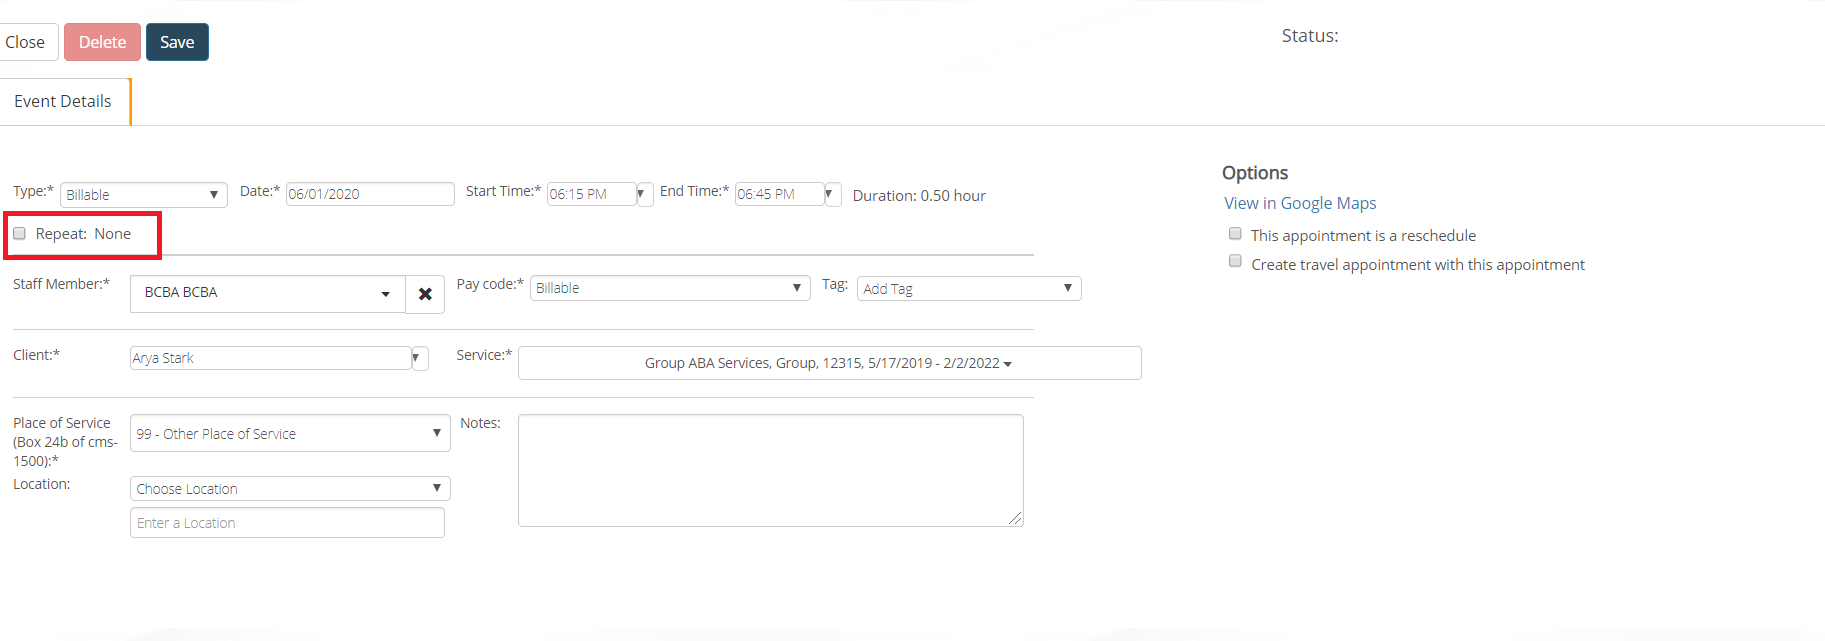 Complete the required fields of the recurrence pattern 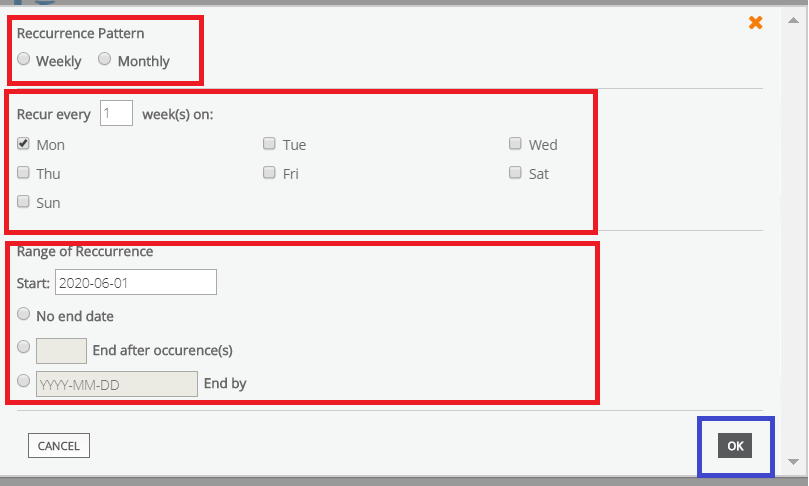 Select if this is a weekly or monthly recurrence pattern Select the days of the week for the appointment series Select when to end the appointment series |
|
...
Steps | Description | Helpful Information |
|---|---|---|
Editing an Appointment | To edit an appointment, first choose Open Occurrence or Open Series on the existing appointment. 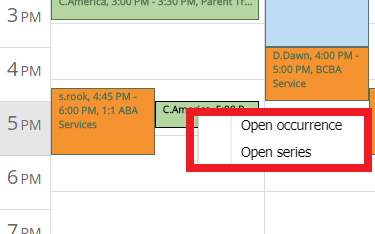 With proper permissions, you can edit any appointment field Select the field and make applicable changes Select SAVE when complete 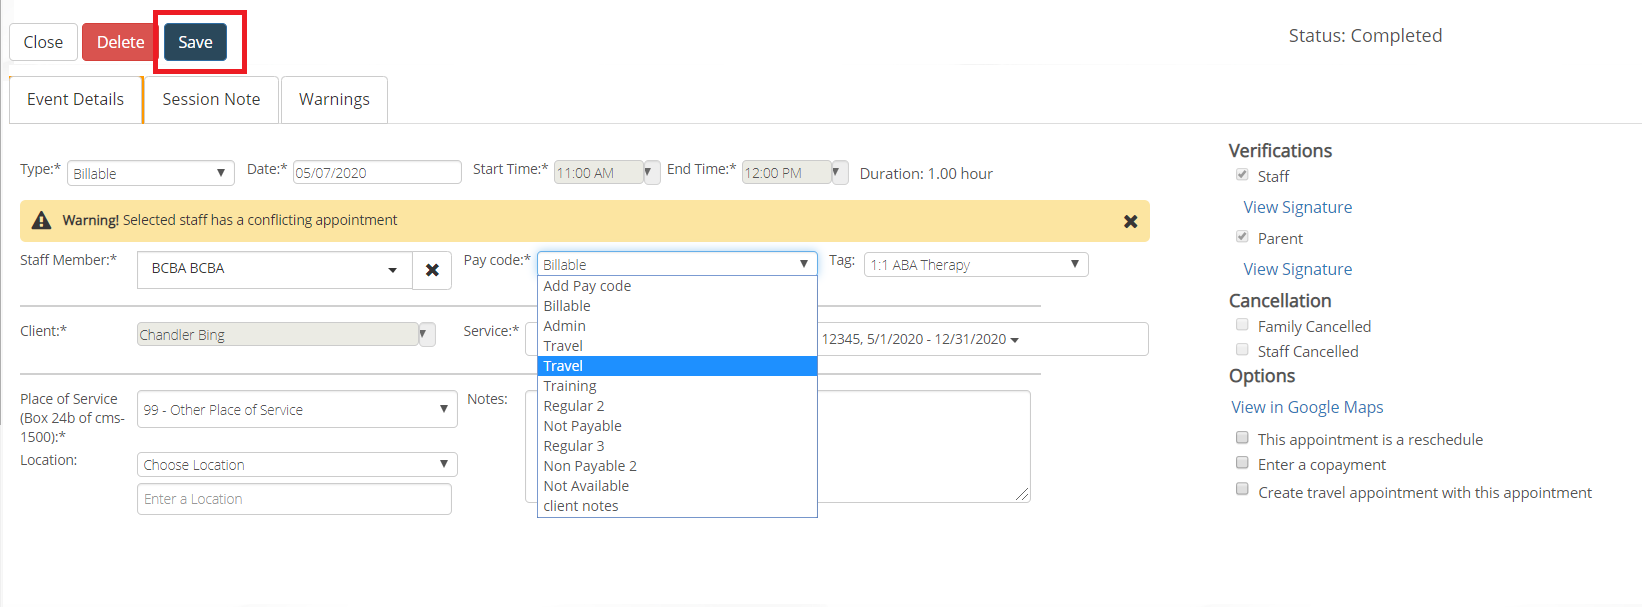 When updating a Series appointment, once SAVE is selected the following screen will appear: 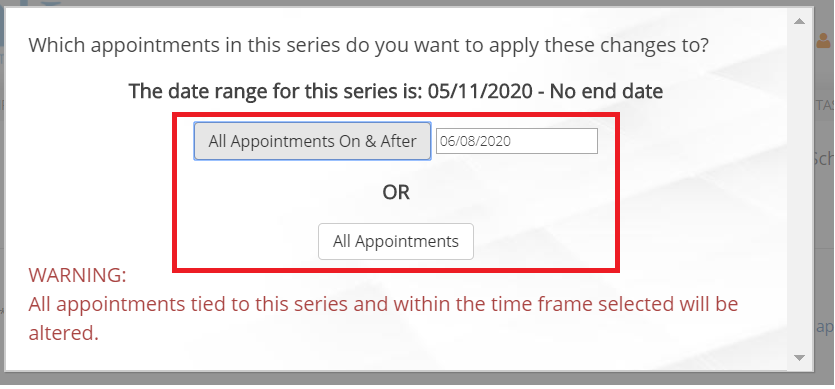 Choose whether to save these changes as of specific date OR if these changes apply to the entire series |
|
Drag and Drop | Users can also change the date/time of the appointment by utilizing the drag and drop feature.
 |
For more information on this feature, please refer to the following resource: Drag and Drop |
...
Steps | Description | Helpful Information |
|---|---|---|
Uncancelling an Appointment | In a cancelled appointment, user with permission will see a button labeled “uncancel”. 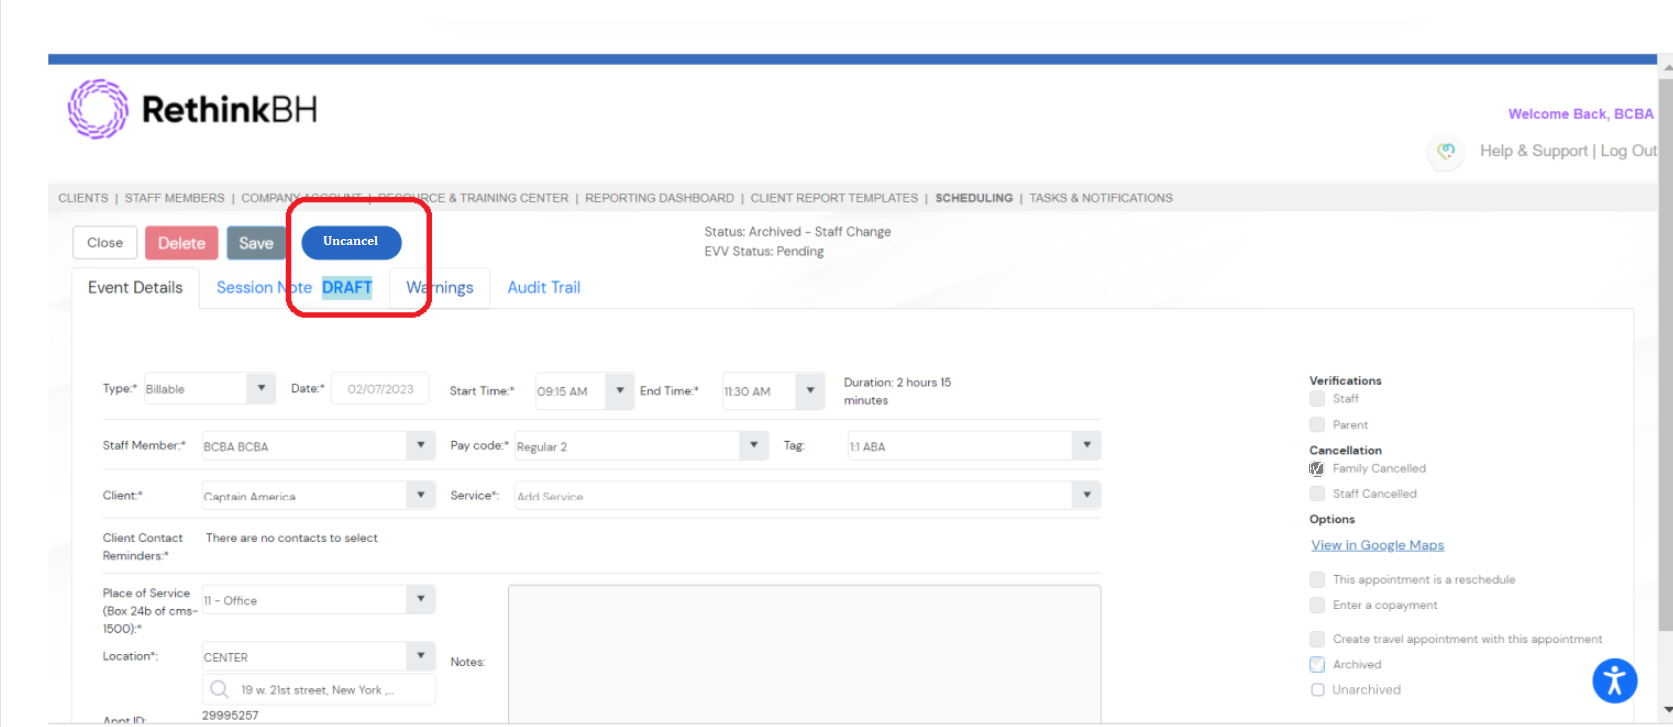 After clicking the uncancel button, the user will be given two prompts: Prompt 1: Confirm you want to uncancel the appointment 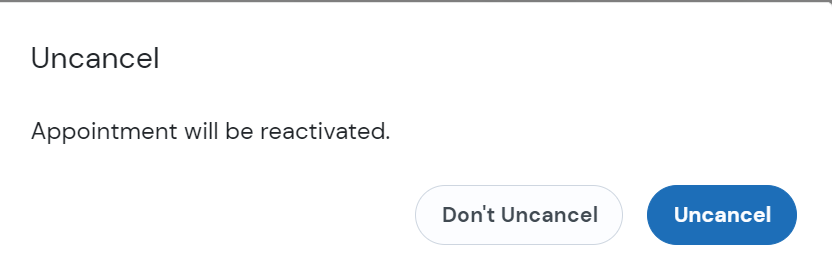
Prompt 2: IF user selects “uncancel”, then user will need to select a reason for uncancelling the appointment. 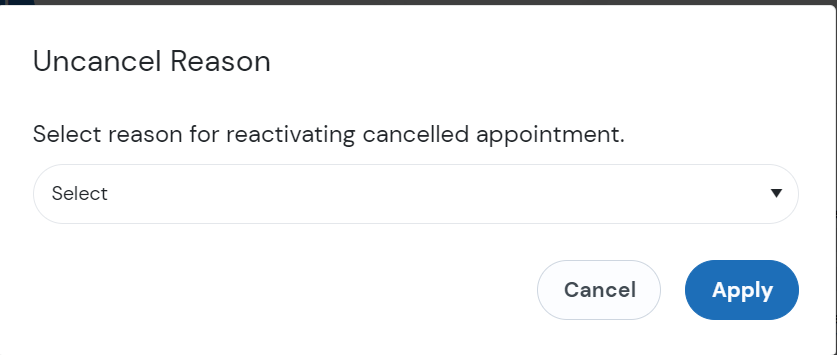 Then click “Apply” The system will update the appointment to its previous status before it was uncancelled. AND The checkbox for “Uncancelled” will be selected with the reason user selected. 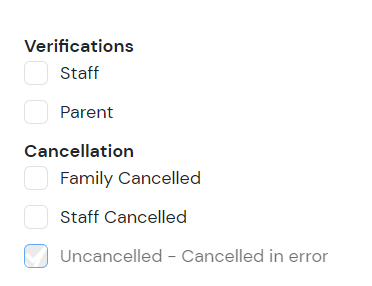 |
|

...