Adding/ Editing Appointments
- To add an an appointment simply click on the calendar at the day/time you want to create the appointment.
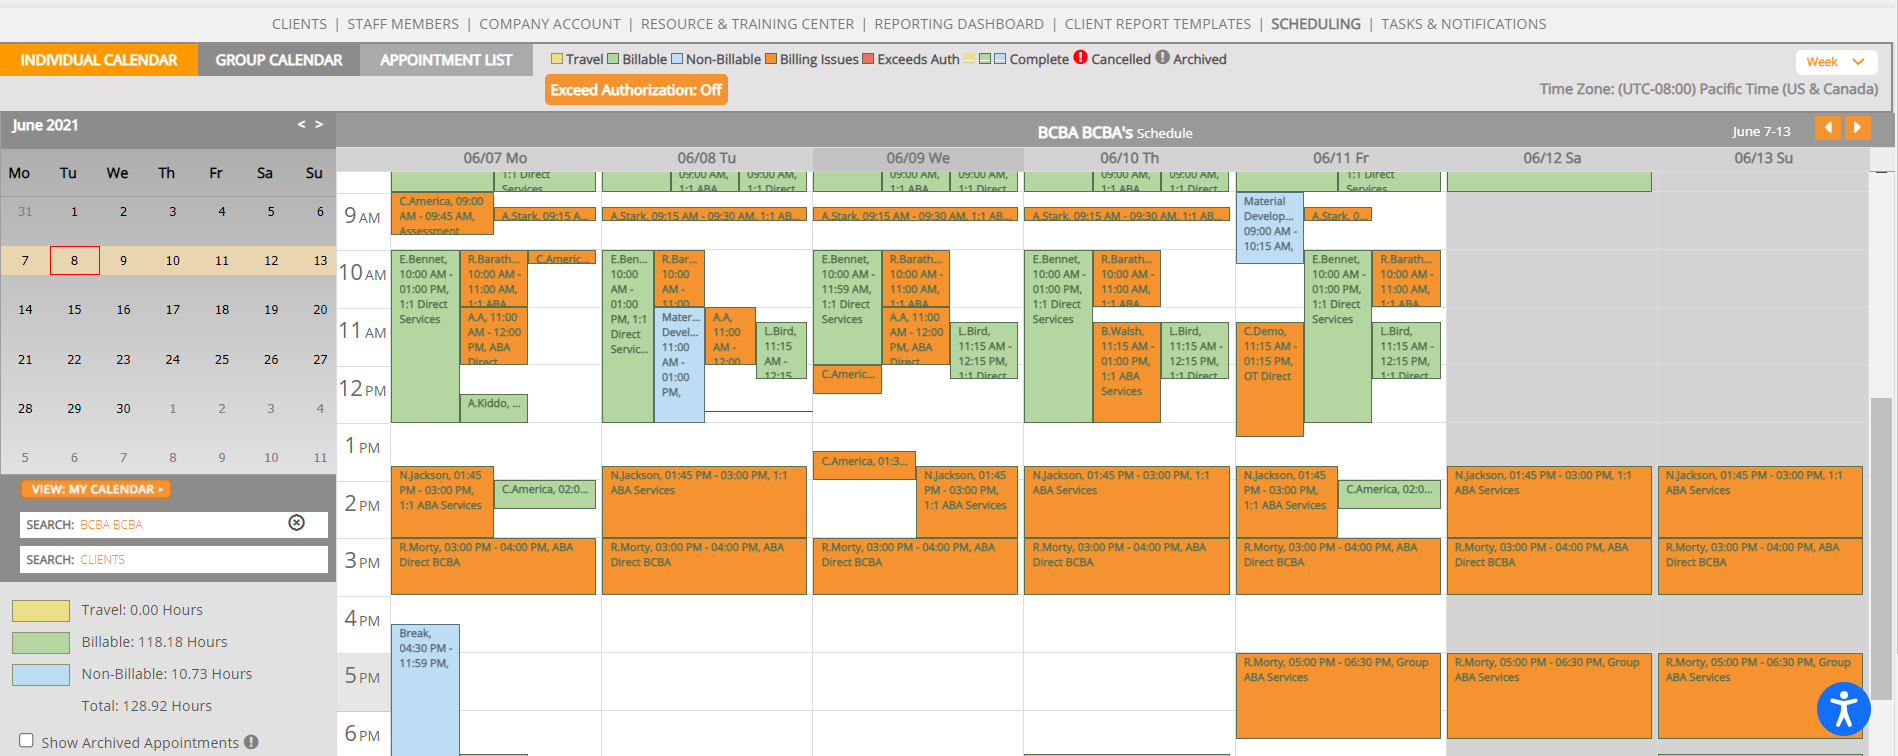
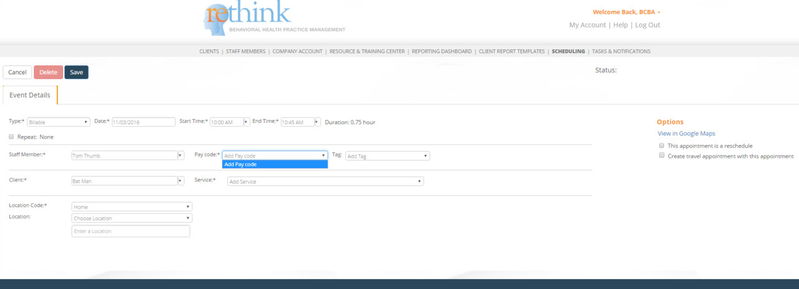
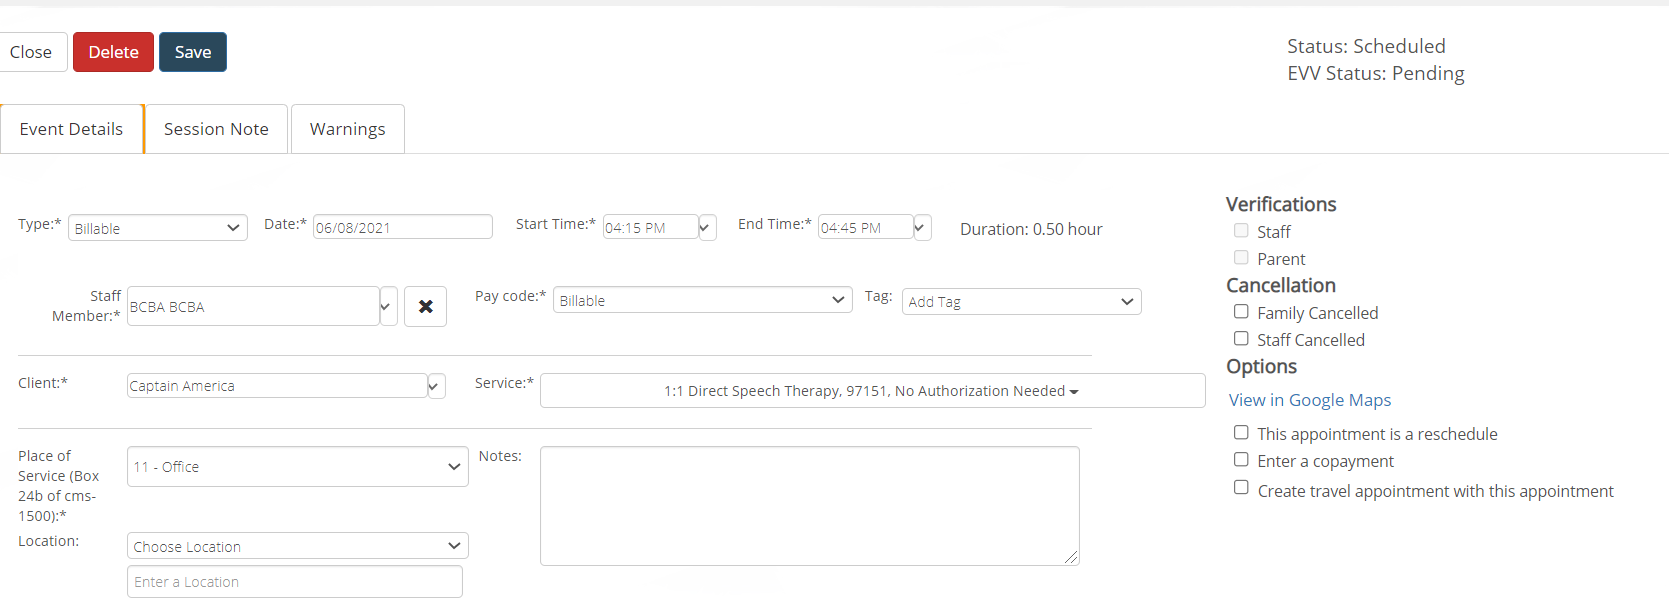
- First choose the type of appointment you want to create (Billable, Non-Billable, Travel).
- Please note that if you select a Billable appointment type then the following fields are required: Date, Start & End Time, Staff Name, Pay Code, Client Name, Service, Place of Service.
- Please note that if you select a Nonbillable appointment type then the following fields are required: Date, Start & End Time, Staff Name, Pay code, Nonbillable Tag, Place of Service.
- Please note that if you select a Travel appointment type then the following fields are required: Date, Start & End Time, Staff Name, Pay Code, and Mileage.
- Complete the required fields which are indicated by the * symbol next to the field name.
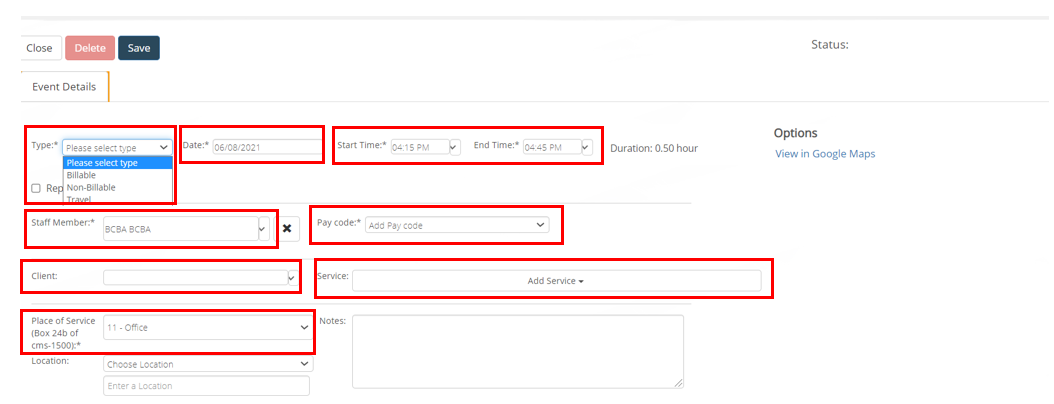
- The options in the service field are based on the authorizations that have been entered for that client or services under the client's funder that do not require an authorization. If you do not see the service you are looking for in the menu, it is likely for one of the following reasons:
- You have not selected a client yet for this appointment.
- An authorization has not been entered for the client.
- The service has been been restricted to only staff with specific credentials & this staff member does not have a matching credential. In this case, you must either modify the credential assigned to the staff member in their profile, or modify the restrictions on that service in the Funder settings of the Company Account.
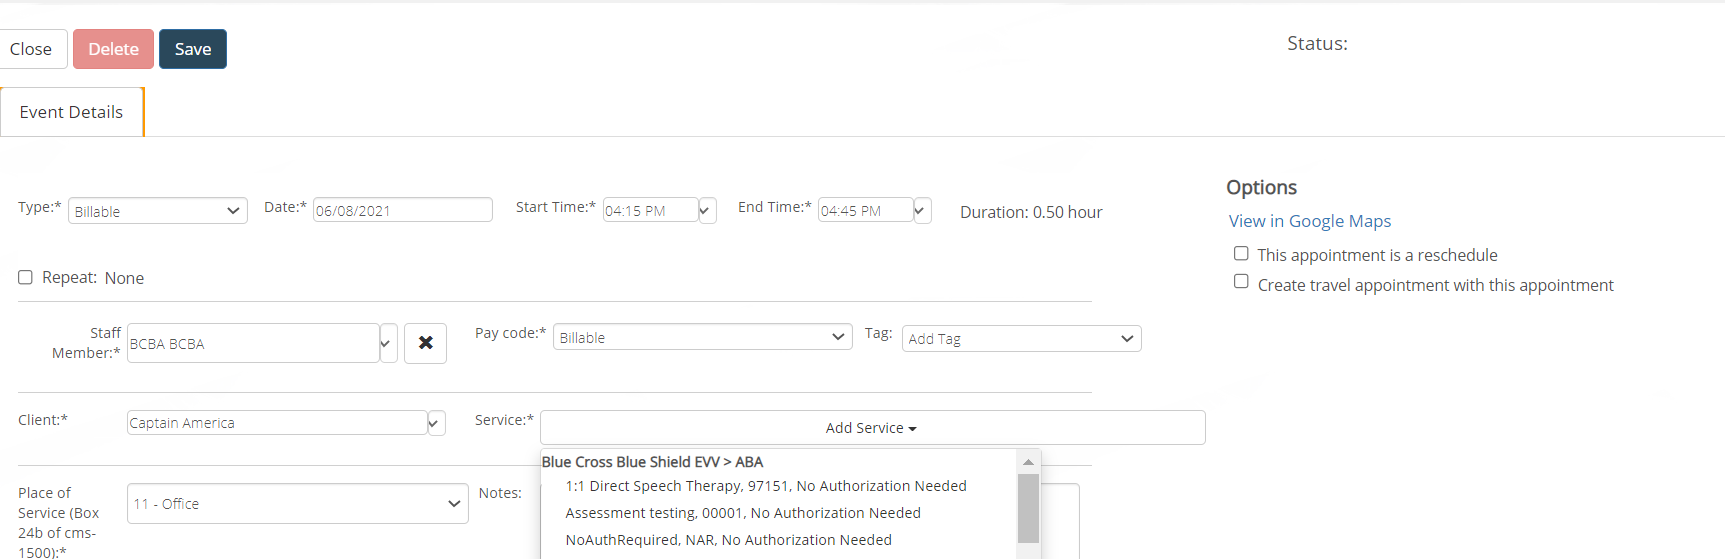
- The options in the 'Pay Code' field are based on the pay codes that have been added to the selected staff member. If you do not see the service you are looking for in the menu, it is likely for one of the following reasons:
- The pay code has not been assigned to this staff member
- The pay code assigned to this staff member are expired.
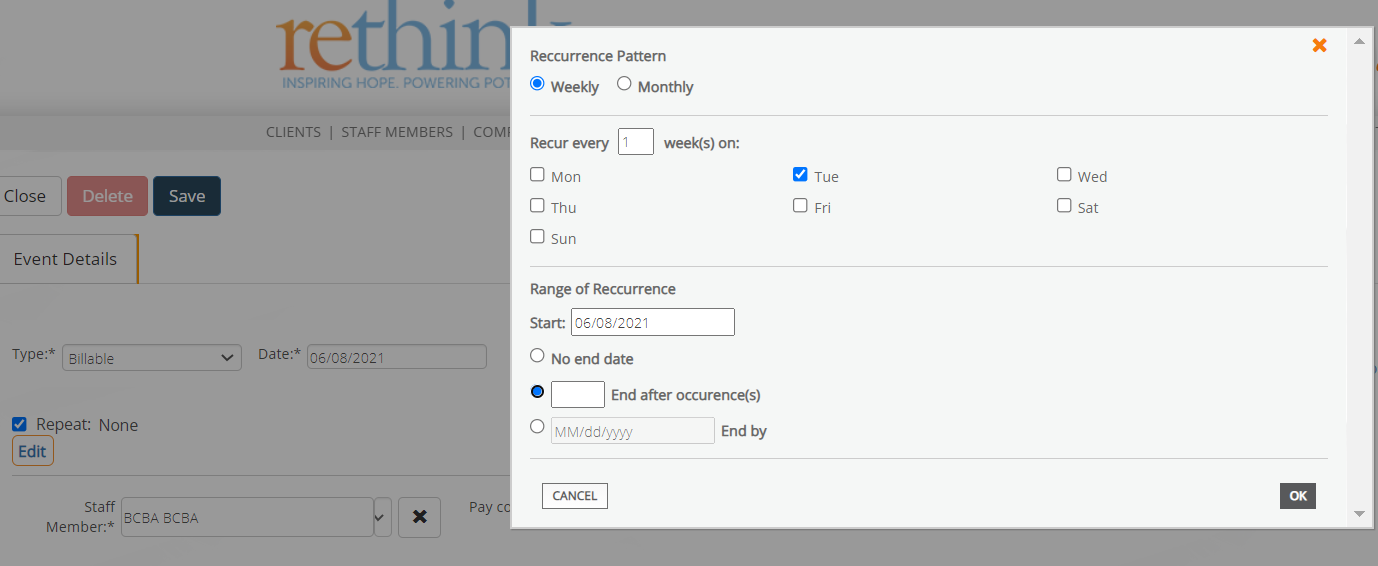
- If this appointment is recurring, select 'repeat' and enter the details of the recurrence pattern. When you save this appointment the system will create multiple appointments based on the details entered. *Please note that we do not recommend entering a recurrence pattern with 'no end date.'
- Once all required fields are entered for this appointment, you can click the blue 'Save" button and the appointment will be visible on the calendar of the staff assigned.
- Please note that only those staff with the appropriate permissions will be able to Delete or Edit appointments
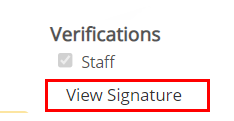
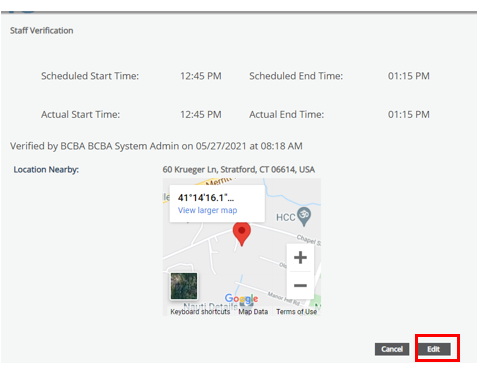
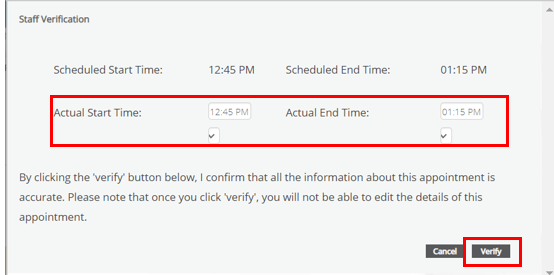
9. Please note that appointments with Staff Verifications can only be edited for time (not date). This editing of the time on verified appointments requires permission by role and must be done by clicking 'view signature' and then 'edit' in the Staff verification window. Once edits are completed, 'verify' should be clicked again to save the changes.
Contact us Support@rethinkbh.com
Related articles
, multiple selections available, Use left or right arrow keys to navigate selected items