Company Set Up Items
- Dawn Mackey
- Joy Helsel
- Dawn Mackey (Unlicensed)
Customize your account to your business operational needs
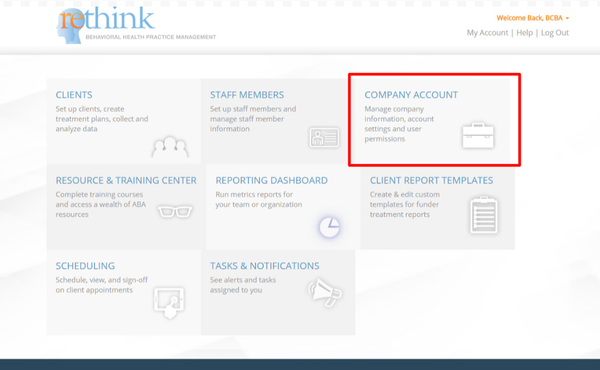
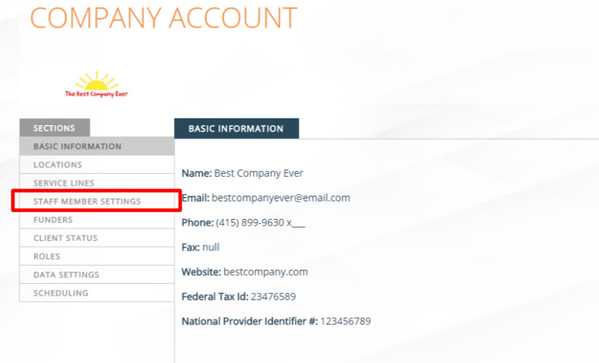
1) Go to your Company Account:
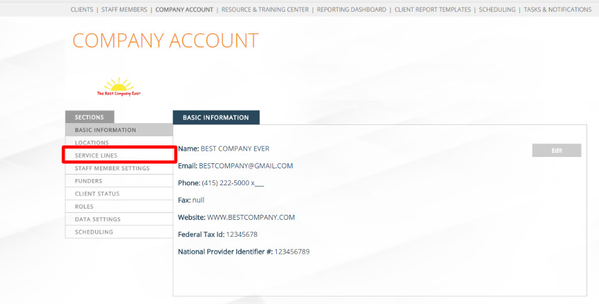
2) Select Service Lines from the menu on the left:
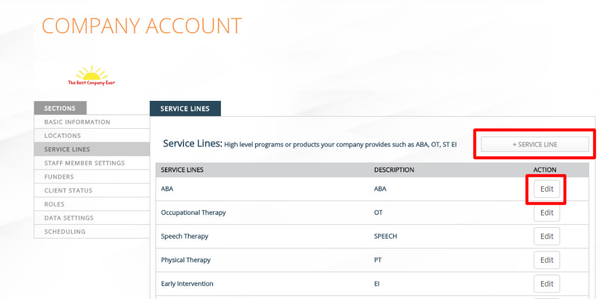
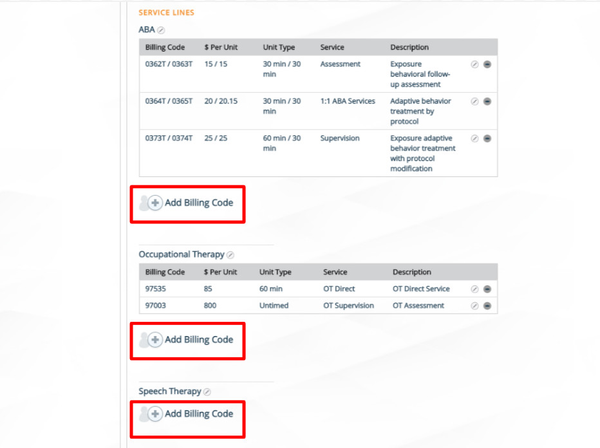
3) Add or Edit your Services Lines: High level programs or specialty
your company provides such as ABA, OT, Early Intervention, Speech etc.)
** If for reporting purposes you would need to distinguish a certain Service Line from another
then that would be reason to add a Service Line. For example, you may want to run reports
for ABA only services or Speech only services. If you have questions about this please contact
Rethink for assistance.
4) Click on Services to Add or Edit a Service: These are the services you will provide for ANY
Service Line or Specialty you provide such as Assessments, Supervision, Direct Therapy etc.
TIP: Keep your service names to a minimum. The same service names can be used for different funders
and billing codes. These service names will be what your staff select when scheduling.
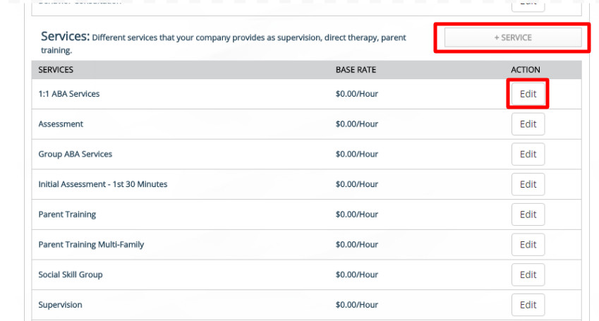
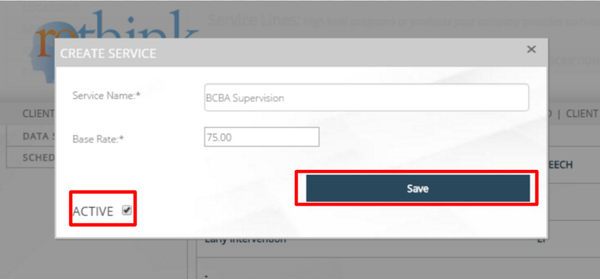
5) Enter Service Name and add *Base Rate for that Service. (*If your company does not BILL by base rates (fee schedule) then enter "0")
- By default the Service will become Active. To make Service Inactive, Uncheck the "Active" Field:
Set Up Funder Billing and Scheduling Rules:
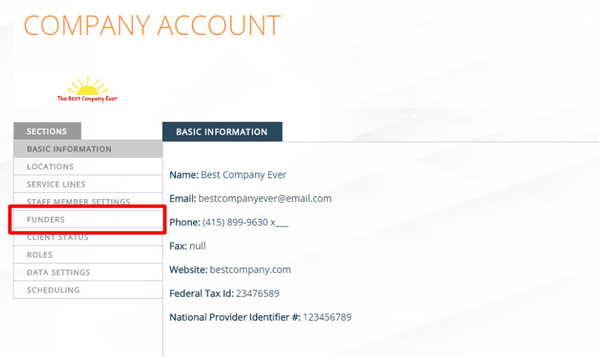
6) Select Funders from the menu on the left:
7) Click View for an existing Funder, then click EDIT to set up the Billing and Scheduling Rules for that Funder:
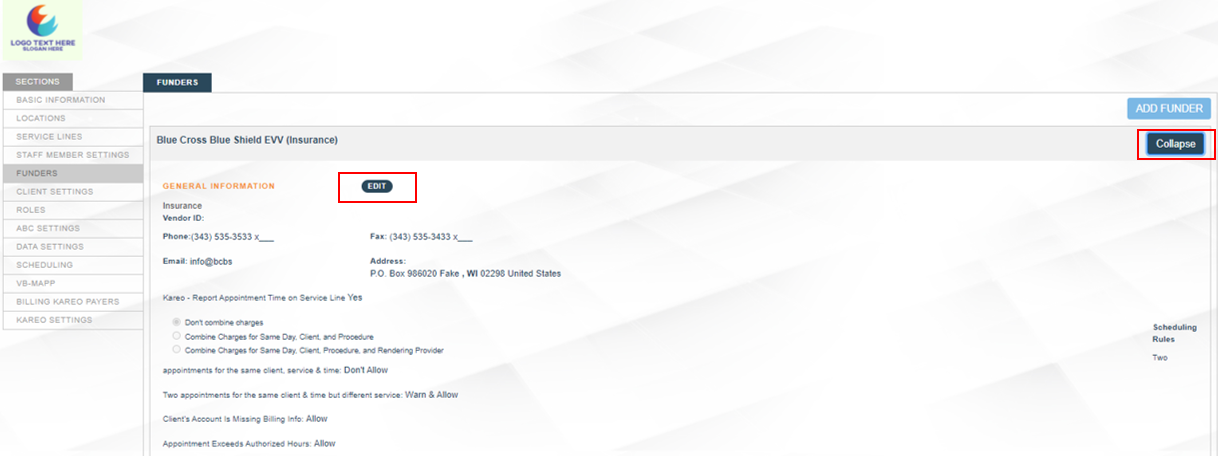
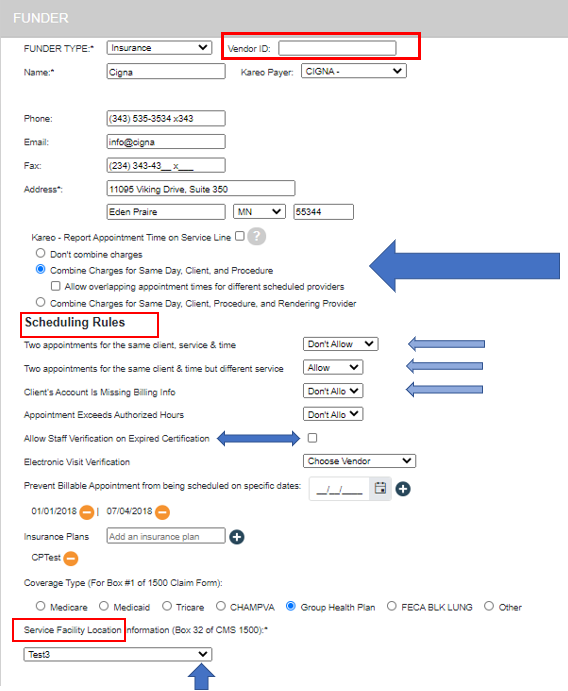
8) Once you click EDIT, make selections pertaining to the Insurance, Private Pay, or Other Funding Sources within this pop-up:
Add a Vendor ID (if applicable)
Need your claim charges rolled up? Select the appropriate Combine rules based on what your funders require. For example: Typically Private Pay, Schools and Regional Center funders do not combine charges on the billing export, but most insurances want charges combined either by same day, client and procedure or by same day, client, procedure, and rendering provider.
Set Scheduling Rules: You decide what type of warnings you will or will not receive when Scheduling appointments such as Allowing concurrent billing for same client, service, and time, etc.
- Allow staff verification on expired certification
Restrict users from scheduling on specific dates: Add in as many Non Service days as you need.
For Insurance Funders select the Coverage Type: System will default to "Group Health Plan"
For Insurance Funders select Service Facility
9) Click View for an existing Funder, and then click  to add Billing Codes the Funder Profile:
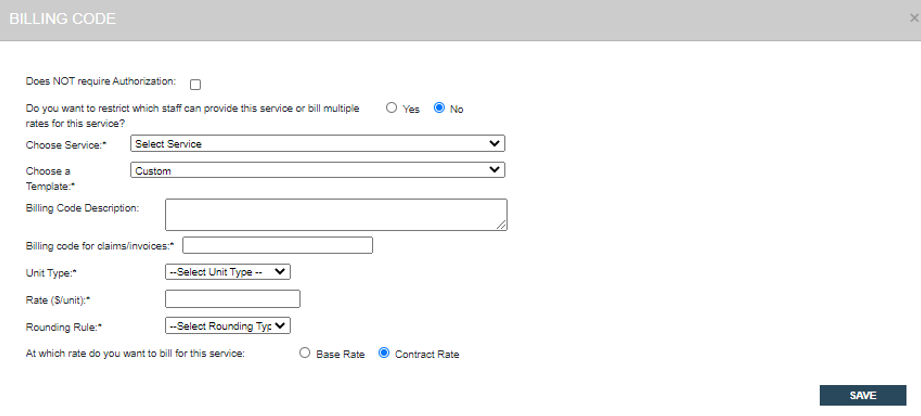
10) Add Service and Billing Code details. The fields marked with an " * " are required:
OPTION 1
To restrict which staff credential can provide a service and bill multiple rates click "yes"
THEN
Complete the required fields
NOTE: If you select restrict then make sure that all your staff that can provide the service has
a credential assigned to them in their Staff Profile.
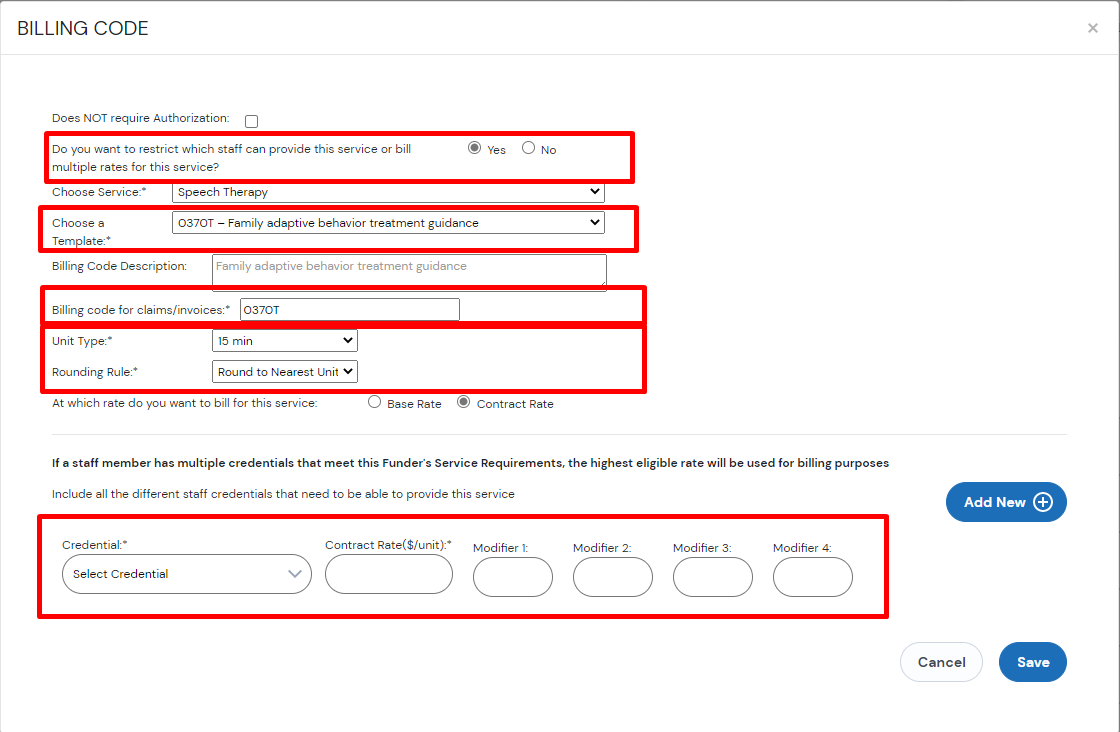
ADD ROUNDING RULES: Insurance Providers do not allow partial unit billing so you must choose a Rounding Rule.
- By default the System will bill at the contracted rate you entered for each service.
- If you bill by your company fee schedule then select Base Rate.
Here is how the Rounding Rules work: (Based on ABAi recommendations)
| Rounding Type | Rule |
|---|---|
| No Rounding | System Default: System will round unit to next 2 decimal place, not whole units |
Round to Nearest | 15 min unit (less than 8 min = 0 greater than 8 min =1 ) 30 min Unit (less than 16 min = 0 greater than 16 min = 1) 60 min Unit (less than |
| Round Up | IF length of appointment breaks the threshold by at least 1 min into the next unit, the system will round up. |
| Round Down | Any partial units are thrown out 15 min unit (less than 15 min = 0 greater than or =15 min =1 ) 30 min Unit (less than 19 min = 0 greater than or = 30 min = 1) 60 min Unit (less than 59 min = 0, greater than or = 60 min = 1) |
OPTION 2
To add Billing Codes with no staff credentials restrictions then select 'NO"
Complete are Required Fields marked with *
- By default the System will bill at the contracted rate you entered for each service.
- If you bill by your company fee schedule then select Base Rate.
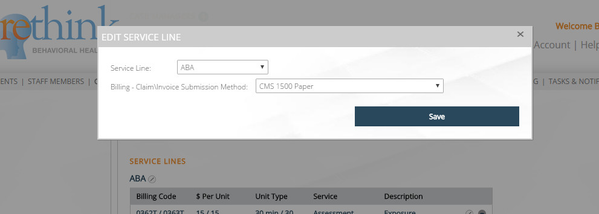
11) Select your Service Line
- Note: Billing-Claim/Invoice Submission Method not currently an active feature
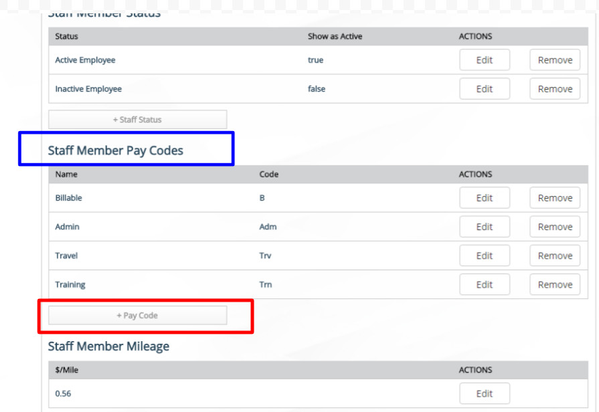
Add Staff Pay Types to the Company Settings:
12) Select Staff Member Settings from the menu of the left:
13) Scroll down to Staff Member Pay Codes: Add in company pay codes to this area
(OPTIONAL): Customize Company Cancellation Types
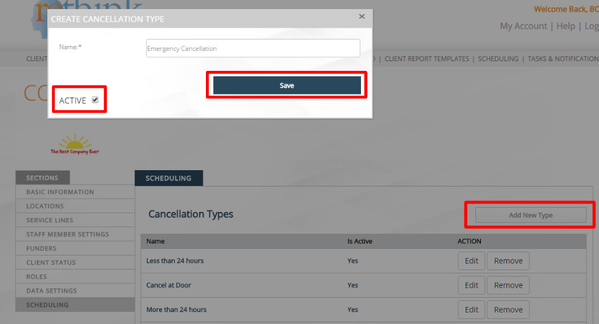
14) Go to Company Account and select Scheduling from the menu on the left:
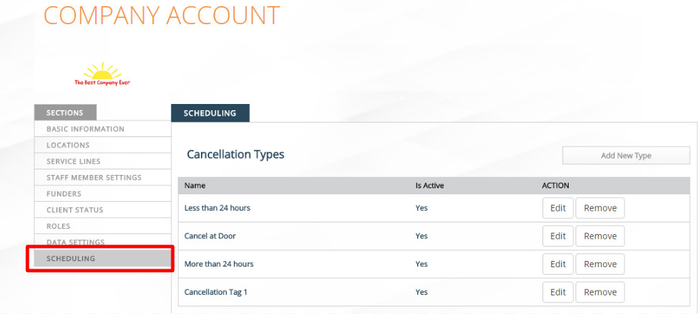
15) Click Add New Type, Edit, or Remove to customize your type of Scheduling Cancellation:
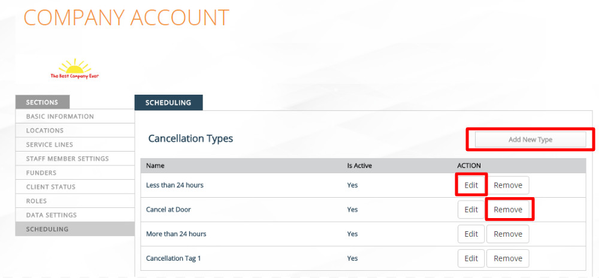
16) Your Cancellation Type will be Active by default. Click Save:
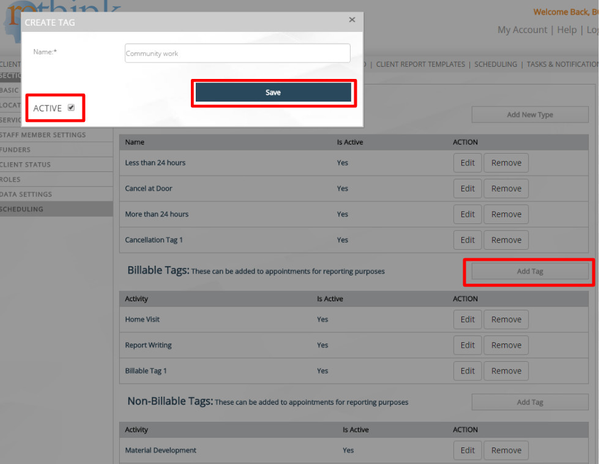
(OPTIONAL): Customize company Billable and Non Billable Activity TAGS
17) Go to Company Account and select Scheduling from the menu on the left:

18) Click Add Tag, Edit , or Remove to enter, edit or delete your custom Billable or Non-Billable Tags:
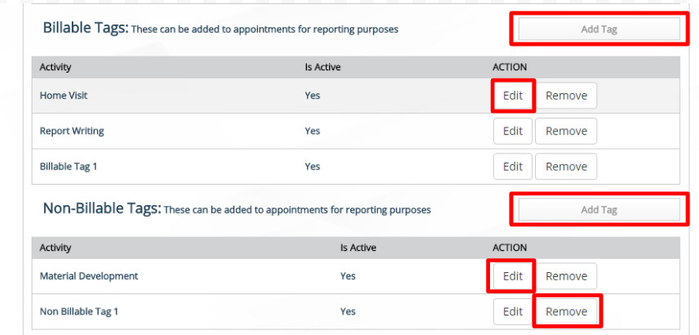
19) Your Billable or Non-Billable Tag will be Active by default. Click Save:
(OPTIONAL): Additional Scheduling Settings:
Set Default Place of Service Code for your Appointments AND Insurance Claim Forms
- Define your company Appointment Verification Requirements--ONLY VERIFIED APPOINTMENTS WILL BE CONSIDERED BILLABLE

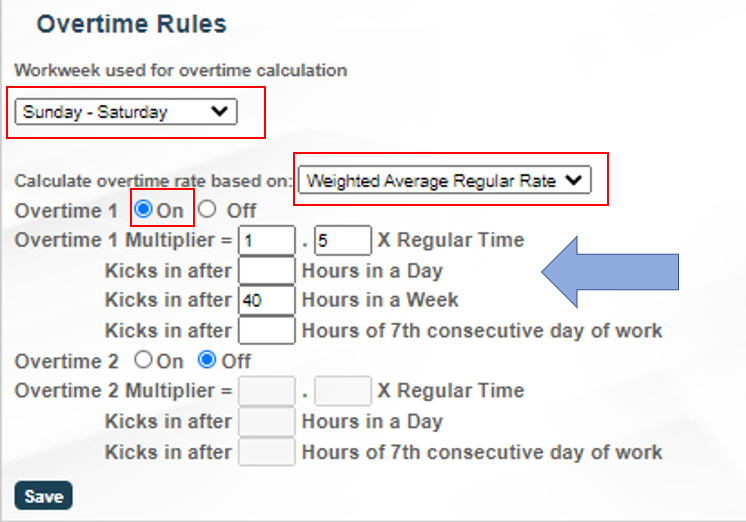
. 3. Overtime Settings
Need Help? Contact us at Support@rethinkbh.com